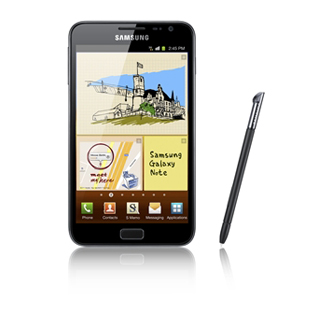
This tutorial guide you to Root & Unroot Samsung Galaxy Note and install Recovery with Clockworkmod. This method will work with Windows only.
Root Samsung Galaxy Note (Windows Only):
- Download Doomlord_v3_root-zergrush-busybox-su_2.zip
- Extract the file
- Connect your Galaxy Note to your computer via USB cable, then tab “Turn on USB storage”
- In Extracted folder, double click runme.bat
- read and follow the instructions on the screen.
- Kudos you gain Root access.
Root Samsung Galaxy Note with CLOCKWORKMOD RECOVERY:
[box type=”info”]
What is ClockworkMod
It is custom recovery for Android phones and tablets that allows user to perform several advanced recovery, installation, restoration and maintenance operations that aren’t possible with stock recovery.
[/box]
- First find out which Kernel you have? Go to Settings -> About phone -> Kernel Version
- You’ll get the following string 2.6.35.7-N7000XXKJ4-CL641703 Here Red is kernel version
- Then download the file that match your kernel version:
Kernel KJ1
Kernel KJ4
Kernel KJ6/KJ7
Kernel KK1/KK3
Kernel KKA
Kernel KK9
- Once you downloaded the kernel, Extract the file in your computer
- Connect your Galaxy Note to your computer via USB cable, then tab “Turn on USB storage”
- Search and Execute not-rooted-yet.bat
- Follow the instructions
- Kudos your Samsung Galaxy Note rooted with Clockworkmod Recovery
UnRoot Samsung Galaxy Note:
- Download this file
- Extract the file to your PC
- Connect your Galaxy Note to your computer via USB cable, then tab “Turn on USB storage”
- Search and Execute runme-UNROOT.bat
- Follow the instructions
- Kudos you Unrooted your phone.
NOTE: This method will not work, if you rooted your phone with CWM
This tutorial guide you to Root & Unroot Samsung Galaxy Note and install Recovery with Clockworkmod. This method will work with Windows only.
Root Samsung Galaxy Note (Windows Only):
- Download Doomlord_v3_root-zergrush-busybox-su_2.zip
- Extract the file
- Connect your Galaxy Note to your computer via USB cable, then tab “Turn on USB storage”
- In Extracted folder, double click runme.bat
- read and follow the instructions on the screen.
- Kudos you gain Root access.
Root Samsung Galaxy Note with CLOCKWORKMOD RECOVERY:
[box type=”info”]
What is ClockworkMod
It is custom recovery for Android phones and tablets that allows user to perform several advanced recovery, installation, restoration and maintenance operations that aren’t possible with stock recovery.
[/box]
- First find out which Kernel you have? Go to Settings -> About phone -> Kernel Version
- You’ll get the following string 2.6.35.7-N7000XXKJ4-CL641703 Here Red is kernel version
- Then download the file that match your kernel version:
Kernel KJ1
Kernel KJ4
Kernel KJ6/KJ7
Kernel KK1/KK3
Kernel KKA
Kernel KK9
- Once you downloaded the kernel, Extract the file in your computer
- Connect your Galaxy Note to your computer via USB cable, then tab “Turn on USB storage”
- Search and Execute not-rooted-yet.bat
- Follow the instructions
- Kudos your Samsung Galaxy Note rooted with Clockworkmod Recovery
UnRoot Samsung Galaxy Note:
- Download this file
- Extract the file to your PC
- Connect your Galaxy Note to your computer via USB cable, then tab “Turn on USB storage”
- Search and Execute runme-UNROOT.bat
- Follow the instructions
- Kudos you Unrooted your phone.
NOTE: This method will not work, if you rooted your phone with CWM